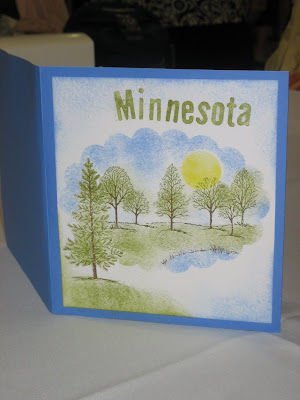
Sunday, August 30, 2009

More about the Stampin' Up! convention
OMG our turtle is popping up all over!


I am so excited and have so many ideas after going to the Stampin' Up! convention. My head is spinning more than normal. I took over 900+ pictures. Here is just part of the displays that were set up for us to view, plus the back sides of the panels. There were 3 more areas of this size that were just cards:


The energy level being among 3000+ other people that love to stamp is just indescribable. I felt like a teenager at a rock concert.


On check-in day, once we "found" our way to the Salt Palace Convention Center (lost? I didn't say lost! Some of us were just a little confused as to which way was North.), we registered and received our "convention bag". It contained: an information booklet with lunch vouchers, a Stampin' Up! pen, a pin with Stampin' Up!s new tag line "Inspire, Create, Share", and 4 stamp sets.

Once I got myself organized, I began swapping my cards. Many of the cards that I received were very inspiring and in the upcoming months you will have the chance to recreate some of them when you enroll in my classes. I have to confess I was really excited when I was able to swap cards with Patty Bennet; but to have her post our turtle card on her blog - OMG!!! Since then I have found our little turtle card also poppin' up several other blogs: Annette Stewart, Jo-Ann Unrau, Tammy Borrello and Brenda's. That is so exciting - thank you ladies, what an honor! Please leave me a comment if she has popped-up anywhere else.

On the first day, every once and awhile I would see glimps of demonstrators carrying little bears with Stampin' Up! aprons. I so wanted one! It became my quest to find out where they got the aporn. Then came the big announcement - all of us attending convention had an opportunity to purchase one. Not only does she have the Stampin' Up! apron but she's embroidered on her paw, carries her only pawsitively adorable stamp (sorry, I couldn't resist) and to complete her look she sports an in-color ribbon of Bermuda Bay. Isn't she adorable!

Her little stamp says: Life without stamps... Unbearable!

Now it's time for a little promotional teasing, after all they did it to me, now it's my turn to do it to you:

So that bear was the first hook that caught me - where was my tiny will power when I needed it. I wasn't going to order any of the bear items when I had seen the Holiday mini catalog, but then I saw them in person - I not only was hooked but I swallowed it hook line and sinker and that's not the end of the story. The Holiday mini catalog starts September 1st. Make sure you check out Stampin' Up!s newest promotion which is an exclusive collection in cooperation with Sizzix and Build-A-Bear-Workshop. The adorable bear stamps and dies are on pages 34-37 in the back of the mini. If you don't have a catalog, you can download one from my website. I've have been experimenting with magnets on the back of the bears and the outfits so children can play with the bears and dress them like paper dolls. Cool idea huh? I will be offering a BABW class through community education later in October. Space is limited.

I had also heard Stampin' Up! was going to offer a digital studio program, I wasn't excited; but then I as watched it being demonstrated at convention and I WAS truly impressed. Keep watch on my website - it is in the final stages of testing and is slated to be released the first part of October. For more info see page 38-39 of the Holiday mini.

One last teaser to tell you about is the Simply Adorned Charms which are simply gorgeous! You can stamp images and change them out for the seasons or whatever suits your fancy. This is something you need to see in person, the pictures in the catalog (pages 32-33) although nice just don't do the charms justice. My sister demonstrator, Ellen B, won one at convention.

Thursday, August 20, 2009

ORIENTAL INSPIRED ANIVERSARY CARD


Our pastor and his wife's had spent time in Japan as missionaries; so I wanted to make an an anniversary card for them with an oriental flair.

I really loved the look of the card until I stamped the inside. I didn't like seeing the words show through; so I attached a layer behind the card front.


Stampset: Hostess set-Kind & Caring Thoughts, Priceless
Ink: Real Red, Old Olive, Basic Black
Paper: Real Red, Whisper White, Basic Black
Accessories: Wide Oval Punch, Lattice Bigz die,
dimensionals, clear embossing


If you make this card, try using a piece of 12"x 5.5" card stock and tri-fold it.

Tuesday, August 11, 2009

August Club Cards - SIP entry

Monday August 10th was another busy day of unpacking. I was wondering if I needed to have my head examined because I had scheduled a club workshop for that night.

Each time my club ladies get together I have several goals I try to incorporate into their 3 projects. These goals are: to teach a basic stamped card (see SIP explanation below), teach a technique, let them use a new or different tool, and create a 6x6 scrapbook page that could alternatively be folded and used as a 3x6 card.

Last spring my up-upline, Patsy Waggoner, had proposed a challenge to her Definitely Diva team. It was to help our new demonstrators with ideas by posting cards that could be made with only things you would get with the starter kit. This month Stampin' Up!s Cofounder and CEO, Shelli Gardner, has posted a SIP creative challenge. It is to create a project with only Stamps, Ink, and Paper. To me that meant the same thing as what Patsy had us do using no embellishments or special tools to create the card or project using only things you would get with the starter kit therefore no brads, no ribbon, no punches, and no Big Shot die cuts. It calls for us demonstrators to get back to the basics and show cards and projects that beginner stampers can say "I could do that!" But at the same time show more experienced stampers how they can easily step up their creations. So with all that being said, here's my card, I believe it meets the criteria for the soshelli creative challenge perfectly:

Stampset: Eastern Blooms, Sincere Salutations
Ink: Cameo Coral, Chocolate Chip
Paper: Whisper White, Cameo Coral, Chocolate Chip

I love the simple elegance of this card. During the club's make & take, I explained this card could be simply embellished by popping up the cut out flowers and I let them use dimensionals on their cards. (Tip for new demonstrators: as an alternative until you get dimensionals, use little pieces of the leftover rubber from when you assembled your stamps.) The other things that could step up this card would be to put dimensionals under the branch layer and put some brads in the various flowers. Also you could tie a small knot in some ribbon and use a glue dot to attach it to the branch.

-----oOo-----

The second card of the night was a case of Kris Sanders convention swap. I had planned to order the butterfly punch, but when I got home from convention and opened my shipment it was AWOL (opps I had it on a different order yet to be submitted) and the ladies had to cut out their butterflies. They had some hands on time to use Big Shot to emboss their whisper white layer and they learned how to use the Stamp-a-ma-jig.


Stampset: Flight of the Butterfly
Ink: Bermuda Bay, Basic Black
Paper: Whisper White, Bermuda Bay, Basic Black
Accessories: Stamp-a-ma-jig, Basic Black Marker,
Elegant Bouquet Embossing Folder


-----oOo-----

The last project for the evening was a 6x6 scrapbook layout. I miss the Raspberry Tart DSP that I designed my 3-D punch flower for, however I realized that Tea Party is another DSP design that coordinates with my flower. Yeah!

This was a quick project with a couple cranks on the Big Shot, some punching, folding of the flowers, sponging, and careful snailing - voila they had a 6x6 scrapbook page.

Snailing Tip: To use this layout as a scrapbook page, you need to attach the flower and sentiment to only the DSP strip. And the strip should only be attached on the outside edges so that a vertical 6x4 picture can be slide behind the DSP paper strip.


Stampset: Great Friend
Ink: Old Olive, So Saffron
Paper: Whisper White, Old Olive,
DSP Tea Party, Almost Amethyst
Punches: Curly Label, 5 Petal, Trio Flowers
Accessories: So Saffron Grosgrain Ribbon,
Sponge Daubers, Sweetest Stem Embosslit die

TURTLE CARD - Sharing projects at convention

On July 28th Stampin' Up! announced: We want you to share your best work at the Marketing Resource Center at Convention 2009. We'll display samples related to the topics listed below at the event, plus there is a chance that your samples may be shown in Stampers' Showcase in the coming months!


Kid Campaign: Make workshop demonstratable projects for kids--or for the kid in you.
Holiday Extravaganza: Make holiday workshop projects.
Sizzix Big Shot Pop-Up dies: Make projects using any of our pop-up dies.
And don't forget to try out our Look Here Bigz XL die!
Sizzix Big Shot Movers & Shapers dies: Show off your skills with our Movers & Shapers dies.
However I wasn't home and didn't have access to the internet. I was busy dodging frosting and cake samples that were flying through the air (see my Sponge Bob post).
-------------------------------------------
Sunday August 2nd:
You know how much work there is to do when you get home and you've been gone for a week: unload the cooler, make out a grocery list, unpack stuff, put away stuff, wash clothes, go get groceries, so on and so on. Such was my activities when I got home on Sunday August 2 and Monday.
Monday August 3rd:
I read the above announcement. My thought was "It would be a miracle if I made a pop-up ball card to be displayed especially since I'd NEVER done one before." The day flew by, between appointments and errands I tried washing clothes, but our dryer is wired to off-peak power and it was being controlled; I couldn't dry any of already wet loads that were already washed. That evening my hubby took me out to supper for my birthday. I was sooooo excited about going to Stampin' Up!s convention, I couldn't get to sleep Monday night, partly thinking of the things I still had to do and I kept wishing I could think of a card worthy to be displayed at convention. I was all excited and my imagination was really working overtime. I think the last time I looked at the clock it was 5 am.

Tuesday August 4th:
YEAH! My dryer was working - WooWho! and I only had 2 more loads to dry and then hubby and I would have the "essentials" to make it through the week. My clothes were in piles everywhere, I was unpacking from the last week, washing, and trying to re-pack. Dan joked that I should have a "Pilot's" (pile it's) license.


However amid all the chaos, all I could do was think about the dream I had about a double pop-up card. The front had trees that wiggled and a beach with Minnesota stamped on the bottom, then the inside had a beach ball with moving water and a turtle sitting in the sand with a butterfly on it's back with the saying: "Sand, Water, & Sun, Makes our Summers Fun!"

I shared my dream card and thoughts with my sister demonstrators; I think they were ready to have me committed. Kris was staying with me Tuesday evening and we were leaving at 4 am so we could fly out of Fargo. I don't know who encouraged who, but we worked late into the night/early morning bouncing ideas off each other. We cut out the pieces and then packed them up so we could finish putting the card together in Salt Lake City.

Wednesday August 5th:
Here's the card. We simplified my vision and changed some of the details, but we're happy with the end result.


It was so fun having ladies come and take pictures of our turtle while we filed out the information to put on the back of the card.

Tip: This was our first attempt at making a pop-up ball card; we would recommend using larger rubber bands and doing a double layer of card stock for the top hexagon.


Here is our card on display at convention. YEAH!

Sunday, August 9, 2009

My Convention swap card

Below is the card I made to swap with other demonstrators at the Stampin' Up! convention. I wanted to include the 3-D flower from my "Mom" card that I posted earlier, however I was so excited about going to the convention and had so many ideas that I was having trouble concentrating ... in other words I was a mess!

If it wasn't for my daughter's patient listening as I babbled on and on, I never would have gotten 96 cards done. Therefore many, many thanks goes to my daughter Amber for helping me focus, simplify my card layout, and for all the hours of help in assembling the cards.

Stampset: Great Friend Paper: DSP-Razzleberry Lemonade, Whisper White, Crushed Curry, Melon Mambo, Rich Razzleberry, Green Galore Ink: Rich Razzleberry, Green Galore Accessories: Sweetest Stem Embosslit Punches: Trio-flower, 5 petal flower

I love all the texture you get by folding the 2 of the 5 petals up before attaching the flower to the stem. Here is a close up of what the first 10 cards looked like:

Now you're probably wondering why only 10 cards when I said we made 96. Sadly the length of time that it took to do the folding and gluing on 10 cards, I decided I needed modify the way the flower looked in order to speed up the assembly time. So after ripping out my compulsive heart, and taking a several deep breaths, the rest of my swaps were finished with the little flowers being layered on the left and a single bud on the right side. (I just wanted to share the different options on how you could make these delightful 3-D flowers.)

Sunday, August 2, 2009

Sponge Bob Birthday

I have to confess, I don't get the whole Sponge Bob thing, and I'll admit I have not watched the cartoon either. I was told little Brayden runs to the TV and dances when the music for the show comes on.

Well I guess I'm just as guilty. When I found out my cousin was going to make a Sponge Bob birthday cake for my sister's little one; I just HAD TO keep with the theme and make his first birthday card from me - yes it's shamefully true you guessed it - I made a Sponge Bob card.

Paper: Yoyo Yellow, Whisper White, Ruby Red, Cameo Coral, Basic Black, Green Galore, Brilliant Blue Ink: Basic Black Accessories: Assorted Punches, White Gel Pen


Brayden was allowed to stick his finger in the frosting to sample it.


However his little hands were quicker than his mom's and
he did a little more than just sample some frosting with his finger:


Then he shook his hands and there were samples of frosting and cake on the walls, window, table and floor, and his mommy too!

Our entertainment continued as Brayden's parents tried to clean up the mess. I don't know which is worst wiping up broken eggs or frosting.

Here's the clean "quick-draw mc-birthday boy"
after the washcloth came to the rescue.


Now isn't this commercialism at it's best?

The only thing that would have made this
party better would have been:
Carmel.
Mmm, Ooo-la-la!