Showing posts with label 3-D projects. Show all posts

Monday, May 17, 2010

45 Graduation cap cards


You're looking at 45 graduation cap "spring" cards. This time I almost followed the spring card directions without changing too much.


These cards fit in the medium envelops. When the graduate pulls out the card the cap springs up. 40 of these are for the Minnesota Leadership swap that I signed up for plus a few for the graduation parties we have been invited to attend.

Monday, May 3, 2010

Mother’s Day Pansys

OMG! These pansy's are so adorable. Here is the Mother's day card that stampers made at my Monday mini class on May 3rd.


Colors: Crushed Curry, Very Vanilla, Rich Razzleberry, Glorious Green, Shimmmer White

Punches: Bird, wing & branch; Butterfly, Wide oval, Scalloped oval
Big Shot: Manhattan Floral embossing folder, Top note die
Accessories: Fire & Ice brads, Curry Polka dot ribbon


Can you believe it's made from our butterfly punch - yeah sure you betcha' - look again - see. How cool is that?

Okay I know I'm not the best photographer, but those little specks on the flowers are actually the sparkles that are in the shimmer white paper. I'm so proud I was able to capture the shimmer. These are so spectacular in real life.

The larger leaves are the wings from the bird punch. At first the leaves looked so flat and out of place, therefore to add dimension to the leaves, I used the mat pack (pg 191) and Empressor stylus (pg 188). The stylus is like a ball point pen without ink, it rolls so smoothly.

DRY EMBOSSING TIP: Hold the leaves at the base, start pressing at the tip and pull towards you. If you start at the branch and push towards the tip of the leaf, the leaves have the tendency to rip and pull off the branch.

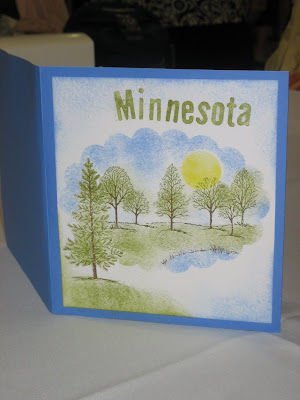
Dawn Olchefske is the very talented demo and creator from right here in Minnesota. Check out her "How to" video tutorial and make sure you leave her a comment. Thank you Dawn for sharing!

Thursday, April 29, 2010

Friends, Flowers & Faith
Grow in God's Love

The first 30 flower peppermint paddy favors were fun to make. The 90 others that followed made me so very glad that I had friends helping me. The fellowship made the time and task enjoyable. I never could have done it without them.

We had several ladies taking some pictures of all our lovely decorated tables, I am trying to track down some pictures. We had about 110 guests attend our Supper Flower event on Wednesday evening April 28th with a demonstration by Karen Kreiser, owner of Wildwood Nursery.

The wonderful compliments we have received have us all energized and excited. We have already started making plans for a fall event. If you have a suggestion for a fall type favor - I'd love to see an example. Just post a link in the comments.

Monday, March 29, 2010

Easter basket

I had an idea for an Easter favor and just had to take a break and try it out before I forgot. It's a little basket made with the Perfect Setting die. For the bottom, I simply put in a cupcake paper liner. Easy Peasy!

Big Shot:
Perfect Setting, Texture plates, Little Leaves sizzlit, 
Tip: save the little eyelet cutouts for the center of the flowers,
Colors:
Lovely Lilac, Old Olvie, Cameo Coral, Summer Sun
Bunny:
Whisper White, Chocolat Chip ink, Creamy Carmel marker


All that's left is to go buy some goodies to fill it up with. 
What do you think?

Friday, March 19, 2010

Storage idea for alphabet letters

Here's something I shared at a SU meeting earlier this week. The "disposable" society we live in will tell you this idea isn't practical because you could almost cut a whole pack of paper for what it costs to buy this little container. I have no excuse for my defense. By the time you pop out all the letters and sort them into their spaces, I'm not sure it even saves time. 

BUT I don't have to be logical! I am Woman! 
No more explanation should be necessary!   ; )

It bothered me to toss all those extra letters. On more than one occasion I've dug through my recycle pile looking for just a couple letters muttering: Why did I throw away all those extra letters? Here's my solution.

Do you recognize what container this is? 


It's a 4 times daily pill dispenser. I punched circles out sticker paper to cover the Morning, Noon, Evening, and Bedtime words and then glued the letter on top. Pretty creative huh? There's days I just amaze myself (snicker, snicker).

This works great. The letters don't slide under or over the dividers like in other containers I tried. The bottom for each space is rounded so the letters don't get stuck in corners and are easy to pull out. Each letter has it's own cover and I don't have to worry about my kitten making a big mess when she tries to help me. . . Oh one more thing even though it's plastic it makes me feel like I'm being "green" because it's a reduce, reuse, recycle thing - and saving trees. 

Speaking of saving - once you sort out all the letters, you still have a lot of paper with letters left. The negative images still need to be rescued. An example of what I mean is the "r" found on my son's birthday card. 


How cool is that?
What can I say? I just have to spice things up sometimes.

Monday, March 8, 2010

In the Dog House

Got-ta love Sale-a-bration FREE stamps!

I'm behind on making special cards. My up-upline was pretty ill and I wanted  something special to send her. I was waiting for my "Wellness Wishes" set to come and had planned to use the "Praying for you during your illness" stamp from that set. But this 3-D card is what I ended up with, hope she liked it. Better late than never, right?


Doesn't the SAB paper make for an adorable back drop?

I left the one side of the top un-sticky-taped so I could send it in the mail. I cut off the front flap and folded it in half, then attached it to the back flap. That way it could be assembled like a box without needing to be taped on the bottom. Here's what it looks like going into the envelope. A perfect fit with some room to spare.


This time I actually made two so I could have one for my own display, but her sister ended up having a terrible week and needed to have a tooth pulled because of an infection. I decided she needed a pick me up card, so here it goes off to the mailbox. It's a good thing I never sticky taped mine together. 

Tuesday, February 9, 2010

Valentine projects, SCCSC3=Easel card

I thought I was off to a good start when the stampers arrived, however I soon found myself laying things down and then not being able to find them. I couldn't believe it when I mislaid the cut card stock for their easel card; I had to re-cut ALL the pieces while the club members worked on their first two projects.

Then when it finally was time to make that card I also mislaid my mat packs . One minute I was taking my mat packs out of my drawer and the next I found myself at the table holding only the piecing tools. Thankfully we quickly found the mis-laid packs and everyone had a good chuckle. It was just one of those days where a good long scream could have helped. 'Know what I mean?


This little gem was a case of ______'s card. I found the directions on her blog, and thought I saved her address. See it really was a day of losing things.  I loved the idea of using the slit punch to hold the card closed.


If this is yours or you know who's card it is,
please let me know so they can get credit for it.

I try to remember to ask my hostesses to pick one of my sample cards that they want to make for their project. It makes planning so much easier when I know what they want to learn. Here's a peak at my "Berry Pine Stamping" display wall.


The hostess picked the black & red card from a SAB swap made by Mary Hophner. Her simple design lends to the card's elegance and the classic colors of black & white with red accents really pop and catch your eye. It's versatile enough that it can be used as a Valentine's Day card or a wedding card depending on the sentiment you stamp inside. Great design Mary, thanks for letting me post your card.


Now for THAT easel card that gave me so much trouble.
For the front / stand up part of the card, I used Stampin' Connections card sketch challenge tagged as SCCSC3. It was created by Diane Nobel who is part of the Design team for Stampin' Connection AND is one of my sister demonstrators from Patsy Waggoner's downline team.


Everyone really enjoy making this card. It was putzy, but that's my speciality even when I try to be simple. Several of the club members talked about bringing it to work the following day to show it off to their office mates. I sometimes think there's an unspoken contest happening between them.

Here's close up  so you can see the details a little better:

My wish for you is your heart is filled with love this Valentine's.
Thanks for stopping by.

Have a great day. 

Monday, January 11, 2010

Milk carton bird houses

I belong to a small group that's part of our Women's Ministries at my church. Our group is currently planning a spring supper event the end of April. When discussing what to make for favors I told the others about the cute little birds on birdhouses made with the milk carton die that so many people are posting. Here's the sample I made. It was suppose to be a robin, but turned out looking more like a wren.


Friday, November 27, 2009

Thanksgiving favors

Yes indeed, I love those little Bigz #2 boxes that everyone is using to make totes.

I made 9 Blessing Mix totes. And yes I did make them a little more time consuming when I decided to add a watercolored pumpkin and gourd.

None the less, I love the way they turned out.

Here's a candle I stamped.

Wednesday, November 18, 2009

A shimmery case

For those that are wondering about the chocolate Crunch bar, it's no longer unharmed. When I was putting cards together on my display board for a workshop, I wanted to display the wrapper, so I just had to eat it. You agree, it would have been too thick to hang, right?

I was inspired by Ellen Kemper's tote to make this hostess gift.
Here's one of the projects the guests made using rub-ons, the elastic cording, and the new SU ornament punch that's available in the Holiday mini catalog:
The hostess wanted her guests to make an ornament for hanging on a tree, so this is what we came up with:
We talked about many simple hand-made gifts and the different options that Stampin' Up! can help you with for the Holidays. For a fast gift and easy gift, I demonstrated how to stamp on candle.
I did stamp shimmer snowflakes in Dashers horns, but once the image was melted into the candle it was extremely difficult to see the shimmer. I would suggest using two-way glue and dazzling diamonds for a more dramatic effect.

Leave a comment if you'd like me to email
specifics for any of these projects.

Thanks for stopping by!
Michelle Dawn

Saturday, October 31, 2009

My pumpkin got so scared, he took a little poop!

Oh the candy choices we had to make! What to give (and what to stash for later). My first plan was to just put 4 peanut butter kisses in each cello bag, because I thought it would look cute, balanced, whatever; but in the end I put in other candy also. Very few carmels made it into the cello bags ... yummmm. So much for having a stash.


Stamp set: Autumn Harvest
Inks: Old Olive, Pumpkin Pie
Paper: Whisper White
Accessories: small cello bags, candy


The poem reads as follows:
I started to carve a pumpkin
with my carving knife and scoop
But the pumpkin got so scared
He took a little poop!
It looked so cute and funny
Just like a candy treat
So I'm sharing it with you now
Because you are so sweet!


My thoughts about what to do differently next year:
** Sadly it occured to me too late that there's a lot of people that have peanut allergies, so resolution number one is to have no peanut stuff next year.
** Next on my list is to plan Trick or Treat coupon to hand out to the moms (or whichever adult is with them) and have a date set and printed on each coupon, or a list of my upcoming classes.

Monday, October 26, 2009

A little Treat

I love the colors of fall, well most falls anyway. I just had to share a pic of the little treat I made for my hostess and decided to include it with the orders that I am going to be delivering from my last workshop.


Stamp set: Lovely as a Tree
Inks: Old Olive, Really Rust, Ruby Red
Paper: Old Olive, Pumpkin Pie, More Mustard
Accessories: Aqua Painter, Stylus, Hemp Twine, Sizzix Leaves#2

On a piece of 6"x 6" pumpkin pie, I stamped leaves in Old Olive and then water colored them. The leaves and letters were die cut out of More Mustard. I used a stylus to emboss the veins in the sizzix leaves, crumpled them and then used a sponge dauber colored them and the letters. And yes that is chocolate you see sticking out of the end; I thought you'd like to see what was inside.

I'm not sure where the last month has slipped away to. Is everyone ready for the Tricker Treaters that will soon be knocking at your door?

Saturday, September 5, 2009

Community Education Classes


This fall I will be offering a series of monthly card classes through Community Education office. 

Each month you will be able to stamp 5 cards which will include each of the following themes: gal, guy, sympathy, seasonal, and just for fun.

I have also scheduled several project classes. Build-A-Bear magnetic paper doll with case and 6 outfits; stamp and decorate a picture frame; create a 6"x 6" mini flip album.


The above display shows examples of the various outfit choices available to make for the Build-A-Bear paper magnet; and the picture frame. I will also be offering a 6" x 6" mini flip album in October. A sample of the album will be posted later.

Dates and times for the classes are posted
on my Stampin' Up! website calendar.

Tuesday, August 11, 2009

August Club Cards - SIP entry

Monday August 10th was another busy day of unpacking. I was wondering if I needed to have my head examined because I had scheduled a club workshop for that night.

Each time my club ladies get together I have several goals I try to incorporate into their 3 projects. These goals are: to teach a basic stamped card (see SIP explanation below), teach a technique, let them use a new or different tool, and create a 6x6 scrapbook page that could alternatively be folded and used as a 3x6 card.

Last spring my up-upline, Patsy Waggoner, had proposed a challenge to her Definitely Diva team. It was to help our new demonstrators with ideas by posting cards that could be made with only things you would get with the starter kit. This month Stampin' Up!s Cofounder and CEO, Shelli Gardner, has posted a SIP creative challenge. It is to create a project with only Stamps, Ink, and Paper. To me that meant the same thing as what Patsy had us do using no embellishments or special tools to create the card or project using only things you would get with the starter kit therefore no brads, no ribbon, no punches, and no Big Shot die cuts. It calls for us demonstrators to get back to the basics and show cards and projects that beginner stampers can say "I could do that!" But at the same time show more experienced stampers how they can easily step up their creations. So with all that being said, here's my card, I believe it meets the criteria for the soshelli creative challenge perfectly:

Stampset: Eastern Blooms, Sincere Salutations
Ink: Cameo Coral, Chocolate Chip
Paper: Whisper White, Cameo Coral, Chocolate Chip

I love the simple elegance of this card. During the club's make & take, I explained this card could be simply embellished by popping up the cut out flowers and I let them use dimensionals on their cards. (Tip for new demonstrators: as an alternative until you get dimensionals, use little pieces of the leftover rubber from when you assembled your stamps.) The other things that could step up this card would be to put dimensionals under the branch layer and put some brads in the various flowers. Also you could tie a small knot in some ribbon and use a glue dot to attach it to the branch.

-----oOo-----

The second card of the night was a case of Kris Sanders convention swap. I had planned to order the butterfly punch, but when I got home from convention and opened my shipment it was AWOL (opps I had it on a different order yet to be submitted) and the ladies had to cut out their butterflies. They had some hands on time to use Big Shot to emboss their whisper white layer and they learned how to use the Stamp-a-ma-jig.


Stampset: Flight of the Butterfly
Ink: Bermuda Bay, Basic Black
Paper: Whisper White, Bermuda Bay, Basic Black
Accessories: Stamp-a-ma-jig, Basic Black Marker,
Elegant Bouquet Embossing Folder


-----oOo-----

The last project for the evening was a 6x6 scrapbook layout. I miss the Raspberry Tart DSP that I designed my 3-D punch flower for, however I realized that Tea Party is another DSP design that coordinates with my flower. Yeah!

This was a quick project with a couple cranks on the Big Shot, some punching, folding of the flowers, sponging, and careful snailing - voila they had a 6x6 scrapbook page.

Snailing Tip: To use this layout as a scrapbook page, you need to attach the flower and sentiment to only the DSP strip. And the strip should only be attached on the outside edges so that a vertical 6x4 picture can be slide behind the DSP paper strip.


Stampset: Great Friend
Ink: Old Olive, So Saffron
Paper: Whisper White, Old Olive,
DSP Tea Party, Almost Amethyst
Punches: Curly Label, 5 Petal, Trio Flowers
Accessories: So Saffron Grosgrain Ribbon,
Sponge Daubers, Sweetest Stem Embosslit die

TURTLE CARD - Sharing projects at convention

On July 28th Stampin' Up! announced: We want you to share your best work at the Marketing Resource Center at Convention 2009. We'll display samples related to the topics listed below at the event, plus there is a chance that your samples may be shown in Stampers' Showcase in the coming months!


Kid Campaign: Make workshop demonstratable projects for kids--or for the kid in you.
Holiday Extravaganza: Make holiday workshop projects.
Sizzix Big Shot Pop-Up dies: Make projects using any of our pop-up dies.
And don't forget to try out our Look Here Bigz XL die!
Sizzix Big Shot Movers & Shapers dies: Show off your skills with our Movers & Shapers dies.
However I wasn't home and didn't have access to the internet. I was busy dodging frosting and cake samples that were flying through the air (see my Sponge Bob post).
-------------------------------------------
Sunday August 2nd:
You know how much work there is to do when you get home and you've been gone for a week: unload the cooler, make out a grocery list, unpack stuff, put away stuff, wash clothes, go get groceries, so on and so on. Such was my activities when I got home on Sunday August 2 and Monday.
Monday August 3rd:
I read the above announcement. My thought was "It would be a miracle if I made a pop-up ball card to be displayed especially since I'd NEVER done one before." The day flew by, between appointments and errands I tried washing clothes, but our dryer is wired to off-peak power and it was being controlled; I couldn't dry any of already wet loads that were already washed. That evening my hubby took me out to supper for my birthday. I was sooooo excited about going to Stampin' Up!s convention, I couldn't get to sleep Monday night, partly thinking of the things I still had to do and I kept wishing I could think of a card worthy to be displayed at convention. I was all excited and my imagination was really working overtime. I think the last time I looked at the clock it was 5 am.

Tuesday August 4th:
YEAH! My dryer was working - WooWho! and I only had 2 more loads to dry and then hubby and I would have the "essentials" to make it through the week. My clothes were in piles everywhere, I was unpacking from the last week, washing, and trying to re-pack. Dan joked that I should have a "Pilot's" (pile it's) license.


However amid all the chaos, all I could do was think about the dream I had about a double pop-up card. The front had trees that wiggled and a beach with Minnesota stamped on the bottom, then the inside had a beach ball with moving water and a turtle sitting in the sand with a butterfly on it's back with the saying: "Sand, Water, & Sun, Makes our Summers Fun!"

I shared my dream card and thoughts with my sister demonstrators; I think they were ready to have me committed. Kris was staying with me Tuesday evening and we were leaving at 4 am so we could fly out of Fargo. I don't know who encouraged who, but we worked late into the night/early morning bouncing ideas off each other. We cut out the pieces and then packed them up so we could finish putting the card together in Salt Lake City.

Wednesday August 5th:
Here's the card. We simplified my vision and changed some of the details, but we're happy with the end result.


It was so fun having ladies come and take pictures of our turtle while we filed out the information to put on the back of the card.

Tip: This was our first attempt at making a pop-up ball card; we would recommend using larger rubber bands and doing a double layer of card stock for the top hexagon.


Here is our card on display at convention. YEAH!

Sunday, August 9, 2009

My Convention swap card

Below is the card I made to swap with other demonstrators at the Stampin' Up! convention. I wanted to include the 3-D flower from my "Mom" card that I posted earlier, however I was so excited about going to the convention and had so many ideas that I was having trouble concentrating ... in other words I was a mess!

If it wasn't for my daughter's patient listening as I babbled on and on, I never would have gotten 96 cards done. Therefore many, many thanks goes to my daughter Amber for helping me focus, simplify my card layout, and for all the hours of help in assembling the cards.

Stampset: Great Friend Paper: DSP-Razzleberry Lemonade, Whisper White, Crushed Curry, Melon Mambo, Rich Razzleberry, Green Galore Ink: Rich Razzleberry, Green Galore Accessories: Sweetest Stem Embosslit Punches: Trio-flower, 5 petal flower

I love all the texture you get by folding the 2 of the 5 petals up before attaching the flower to the stem. Here is a close up of what the first 10 cards looked like:

Now you're probably wondering why only 10 cards when I said we made 96. Sadly the length of time that it took to do the folding and gluing on 10 cards, I decided I needed modify the way the flower looked in order to speed up the assembly time. So after ripping out my compulsive heart, and taking a several deep breaths, the rest of my swaps were finished with the little flowers being layered on the left and a single bud on the right side. (I just wanted to share the different options on how you could make these delightful 3-D flowers.)

Tuesday, May 5, 2009

Mother’s Day Card Special


Do you need a Mother's Day card? You can make 
2 of these for 
only $5.

I'm offering two different classes: 

Thursday 
May 7th at 7 pm.
Friday 
May 8th at 3 pm.

Register by calling my message service: 736-4001
Ottertail County area Minnesota


Here's a close up showing the details of the punched flower images. Isn't it adorable?


If you bring a friend who also takes this class, as a thank you, both you and your friend will get to make one of these beautiful embossed tri-fold cards. 

There is no additional charge for the bonus card that was designed by Lynda in California.


I'm looking forward to helping you,
Michelle Dawn 


Supplies for MOM card:
Stamps: Lovely Letters, One of a Kind, Embrace Life
Paper: Kiwi Kiss, Regal Rose, Whisper White, Raspberry Tart DSP
Ink: Kiwi Kiss, Regal Rose
Accessories: Whisper White 1/4" grosgrain ribbon, glue dot, Embosslit die Sweetest Stem
Punches: Eyelet Border, Snow Blossom, 1 1/4" Square, 1 3/8" Square, 1 1/4" Circle, 5 Petal flower, Tri-flower